everyday render
everydays [05.31.15] from beeple on Vimeo.
video-hololens-le-casque-holographique-de-microsoft-se-devoile-un-peu-plus
ce que j en pense:
bon hololens c est comme les montres connectées a l'etat actuel c est juste des gadgets inutiles et le resteront tant que pour les montres l autonomie ne passe pas a un moi minimum et pour hololens tant qu il ne sera pas aussi leger et confortable qu une paire de lunette de vue.
mais se sont aussi des technologies qui deviendront incontournable une fois leur defaut de jeunesse passés.
donc pour un developpeur ou une entreprise il faut investir dedans meme si a l'instant present ce ne sont juste que des gadgets inutiles.
http://vimeo.com/107988050

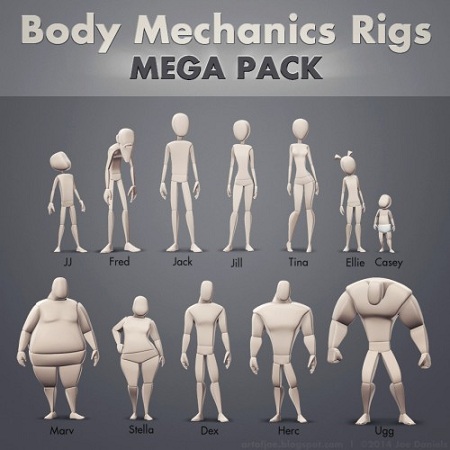
Here is a pack of 12 rigs, designed to be used for honing in those body mechanics and acting skills.
Here’s a longer walk through, showing the key new features:
They will work with Maya 2014 and up, and come with an AnimSchool Picker that can be mapped to any of the rigs by changing the namespace within the picker ui.
peut etre interessant pour faire animation patinage sur glace ou ballet par exemple avec etincelle( cf barbie in pink shoes)
http://www.marvelousdesigner.com/marvelousdesigner/overview
Marvelous Designer allows you to create beautiful 3D virtual clothing with our cutting-edge design software.
Finally breathe life into your designs with tools that enhance quality while saving you time. From basic shirts to intricately pleated dresses and rugged uniforms, Marvelous Designer can virtually replicate fabric textures and physical properties to the last button, fold, and accessory.
With our versatile compatibility with other 3D software and interactive design interface, you can instantaneously edit and drape garments onto 3D forms with high-fidelity simulation.
Marvelous Designer’s innovative pattern-based approach has already been adopted by top game studios such as EA Konami and can be seen on the big-screen in animation films including The Hobbit and The Adventures of Tin Tin, created by Weta Digital.
Designing “true to life” virtual garments is easy and straightforward with our intuitive user interface and tools such as arrangement points and pins. Marvelous Designer saves you from guessing how clothes should fit in real life.
Textural coordinates are packaged along with your patterns for simple data translation and use. Edit textures, fabrics and physical properties via our preset library to accurately simulate onto your characters without costing countless hours.
http://simplylightwave.com/lightwave-tutorial/t549/

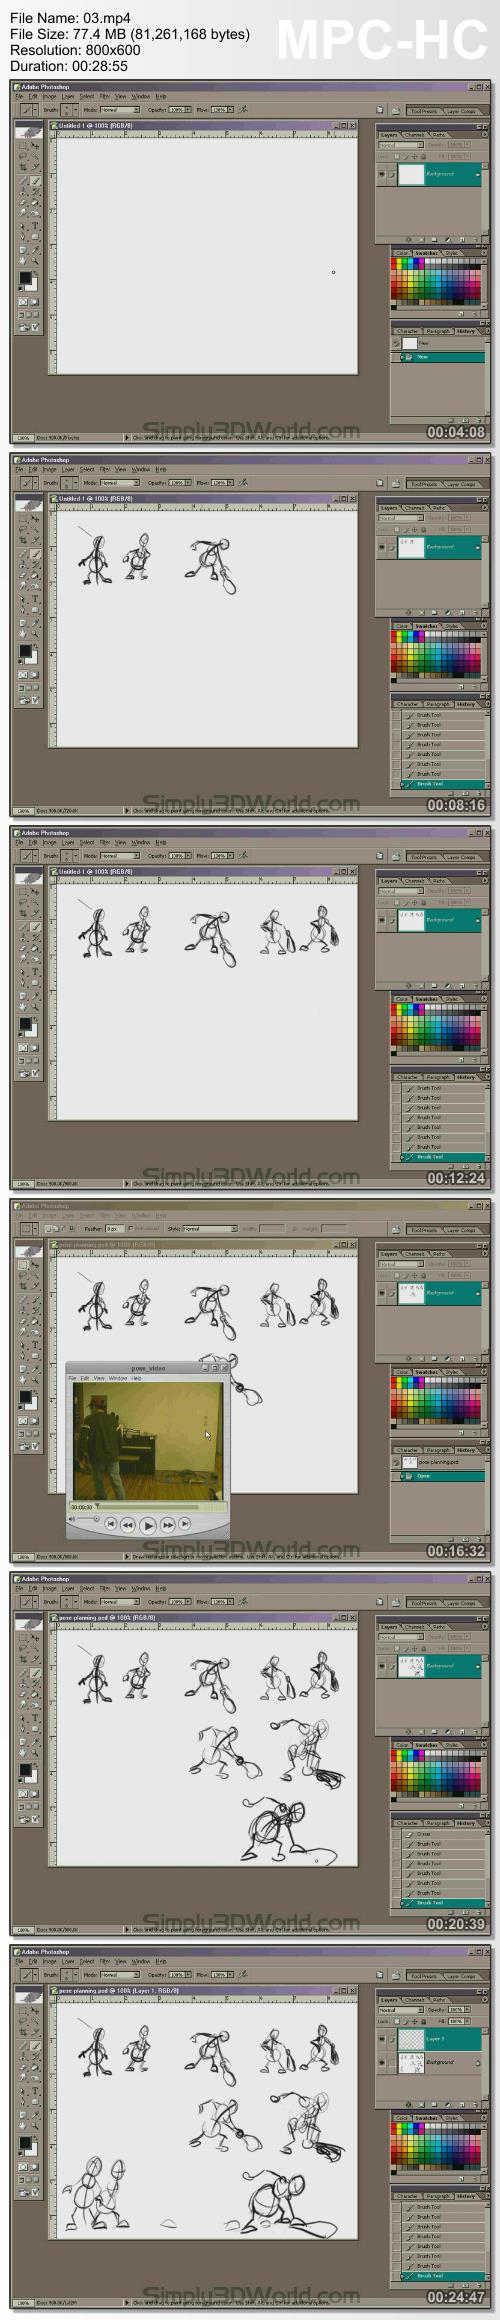
Learn the typical studio production pipeline with pose planning and storyboarding to create a full 2D animatic, which is then converted into a 3D animation in LightWave by following the workflow of pose-to-pose blocking and refining.
This project will get you insight into the planning process for animation, as well as teach you how to apply important animation principles such as squash and stretch, timing and spacing, anticipation, weight, staging and arcs.
Information
Lesson 1: General overview of the animation workflow in LightWave
Lesson 2: Useful animation plugins and preparing the character
Lesson 3: Pose planning and thumbnail sketching begins
Lesson 4: Pose planning and thumbnail sketching continues
Lesson 5: A look at different programs available for storyboarding
Lesson 6: Storyboarding - creating the key poses
Lesson 7: Storyboarding - breakdown and inbetween poses
Lesson 8: Finalizing and exporting the storyboards
Lesson 9: Setting up the key poses and animation blocking
Lesson 10: Setting up key poses and animation blocking continues
Lesson 11: Setting up key poses and animation blocking continues
Lesson 12: Adding breakdown poses
Lesson 13: Adding breakdown poses continues
Lesson 15: Refining the animation and clean-up work continues
Lesson 16: Work on the timing
Lesson 17: Work on the timing continues
Lesson 18: Additional breakdowns and arcs
Lesson 19: Refining the timing and adding extra keys
Lesson 20: Improving the arcs
Lesson 21: Loosening up the animation and secondary action
Lesson 22: Reviewing and tweaking the animation
Lesson 23: Creating the club pick up
Lesson 24: Adjusting tangents and adding final details like blinks