Canalblog
Suivre ce blog Administration + Créer mon blog
Publicité
3d réalisation
3d réalisation
Derniers commentaires
Visiteurs
Depuis la création 14 264
personnage
19 octobre 2017

votre visage en 3d avec juste une photo grace à une ia

ca marche bien mais ca fait un gros nez quand meme :)

http://cvl-demos.cs.nott.ac.uk/vrn/view.php?name=9e0d76120cb48af2ef77578d58bade3b

c est bien on pourra bientot avoir un modele 3d personnage vehicule... a partir quelques photos seulement

Enregistrer

Enregistrer

Publicité
Publicité
27 janvier 2017

xenoma eskin

12 janvier 2017

Basics of Character Rigging in blender

un bon tuto sur l'animation de personnage

https://youtu.be/cGvalWG8HBU

plus dur

Rigging a T-Rex in Blender  https://youtu.be/GXZUmSxPrmM

 avec le fichier https://sketchfab.com/models/e18c433cdd1c49f8ac152348b7384037#


bendy bone https://youtu.be/BsJ3Grq_3GM

31 décembre 2015

make human

Un très bon logiciel libre pour créer des modèles 3D de corps humains pour l'animation ou le jeu vidéo. Il se distingue par son interface intuitive, la foule de réglages et les nombreuses possibilités de morphing. MakeHuman est une réussite permettant de bien débuter dans le domaine de la modélisation 3D.

http://www.makehuman.org/

http://www.clubic.com/telecharger-fiche397748-makehuman.html

18 octobre 2014

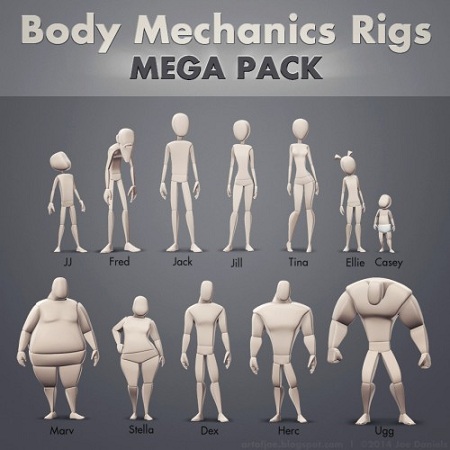
Gumroad - Body Mechanic Rigs Mega Pack

http://vimeo.com/107988050

Gumroad: Body Mechanic Rigs Mega Pack 1.1

Here is a pack of 12 rigs, designed to be used for honing in those body mechanics and acting skills.
Here’s a longer walk through, showing the key new features:


They will work with Maya 2014 and up, and come with an AnimSchool Picker that can be mapped to any of the rigs by changing the namespace within the picker ui.

peut etre interessant pour faire animation patinage sur glace ou ballet par exemple avec etincelle( cf barbie in pink shoes)

Publicité
Publicité
9 septembre 2014

création d'habit

http://www.marvelousdesigner.com/marvelousdesigner/overview

Marvelous Designer allows you to create beautiful 3D virtual clothing with our cutting-edge design software.
Finally breathe life into your designs with tools that enhance quality while saving you time. From basic shirts to intricately pleated dresses and rugged uniforms, Marvelous Designer can virtually replicate fabric textures and physical properties to the last button, fold, and accessory.

With our versatile compatibility with other 3D software and interactive design interface, you can instantaneously edit and drape garments onto 3D forms with high-fidelity simulation.

Marvelous Designer’s innovative pattern-based approach has already been adopted by top game studios such as EA Konami and can be seen on the big-screen in animation films including The Hobbit and The Adventures of Tin Tin, created by Weta Digital.

Designing “true to life” virtual garments is easy and straightforward with our intuitive user interface and tools such as arrangement points and pins. Marvelous Designer saves you from guessing how clothes should fit in real life.
Textural coordinates are packaged along with your patterns for simple data translation and use. Edit textures, fabrics and physical properties via our preset library to accurately simulate onto your characters without costing countless hours.

10 juillet 2014

Caveman Volume 4 - Storyboarding to Final Animation 24 Lessons Project Files Included MP4

http://simplylightwave.com/lightwave-tutorial/t549/

cd41b28317987caa223f85f7cb96369c

Learn the typical studio production pipeline with pose planning and storyboarding to create a full 2D animatic, which is then converted into a 3D animation in LightWave by following the workflow of pose-to-pose blocking and refining.
This project will get you insight into the planning process for animation, as well as teach you how to apply important animation principles such as squash and stretch, timing and spacing, anticipation, weight, staging and arcs.

Information
Lesson 1: General overview of the animation workflow in LightWave
Lesson 2: Useful animation plugins and preparing the character
Lesson 3: Pose planning and thumbnail sketching begins
Lesson 4: Pose planning and thumbnail sketching continues
Lesson 5: A look at different programs available for storyboarding
Lesson 6: Storyboarding - creating the key poses
Lesson 7: Storyboarding - breakdown and inbetween poses
Lesson 8: Finalizing and exporting the storyboards
Lesson 9: Setting up the key poses and animation blocking
Lesson 10: Setting up key poses and animation blocking continues
Lesson 11: Setting up key poses and animation blocking continues
Lesson 12: Adding breakdown poses
Lesson 13: Adding breakdown poses continues
Lesson 15: Refining the animation and clean-up work continues
Lesson 16: Work on the timing
Lesson 17: Work on the timing continues
Lesson 18: Additional breakdowns and arcs
Lesson 19: Refining the timing and adding extra keys
Lesson 20: Improving the arcs
Lesson 21: Loosening up the animation and secondary action
Lesson 22: Reviewing and tweaking the animation
Lesson 23: Creating the club pick up
Lesson 24: Adjusting tangents and adding final details like blinks

Simply Lightwave: Caveman Volume 4 - Storyboarding to Final Animation

10 juillet 2014

Caveman Volume 3 - Rigging, Puppet Controls and More

8435b290f10047b4bc52517f08fc66b6

http://simplylightwave.com/lightwave-tutorial/t548/

Take the mystery out of rigging and learn how to meet the requirements of a demanding animator by providing a fast, fully featured rig.
The topics covered in this tutorial include bones, animation controls and constraints, expressions, hybrid IK/FK setups, as well as efficient weight mapping and skinning. We set up constraints and puppet controls, while looking at good rigging practices, different techniques and how to avoid some common pitfalls, giving us a professional rig as an end result.

Information
Lesson 1: Creating bones for the spine and legs
Lesson 2: Creating bones for the arms and hands
Lesson 3: Adding animation controls
Lesson 4: Adding IK handles and testing deformations
Lesson 5: IK handles and testing deformations continued
Lesson 6: IK handles and testing deformations continued
Lesson 7: Refining the rig
Lesson 8: Creating bones for the head
Lesson 9: Rigging head and neck area continued
Lesson 10: Creating joint morphs and correcting deformations
Lesson 11: Joint morphs and deformation corrections continued
Lesson 12: Deformation tests and refining the rig
Lesson 13: Soft bodies and completing the rig

Simply Lightwave: Caveman Volume 3 - Rigging, Puppet Controls and More

9 juillet 2014

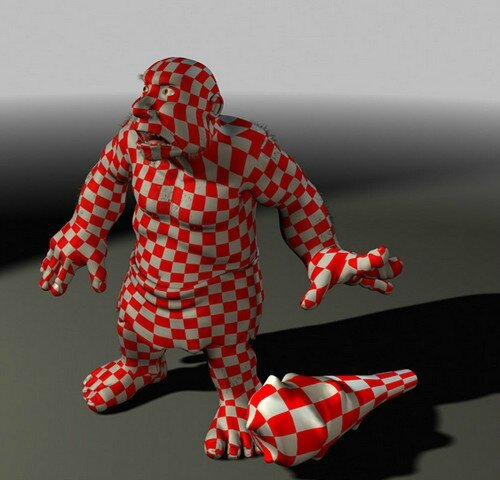
Caveman Volume 2: UV and Texturing

5f0ad78eacecb19ee9088c54f8153afe

Learn how to create a number of different textures for your character work in this project. After laying out UV's in LightWave, we work with weight maps, gradients and procedurals to create a nice base for the textures, before bringing them into Photoshop for hand painting and detailing. Here you'll learn how to create color, specular and bump maps for all your organic needs including skin, eyes, gums, teeth, nails and cloth, and bring them together in LightWave.

Lesson 1: UV layout of the arms, hands and skirt
Lesson 2: UV layout of the head
Lesson 3: UV layout of the remaining body and texturing starts
Lesson 4: Procedural textures for mouth and teeth
Lesson 5: Creating weight maps
Lesson 6: Applying gradients to skin and creating the tongue
Lesson 7: Organizing workflow for texture painting in Photoshop
Lesson 8: Painting textures for head and face
Lesson 9: Painting textures for head and face continued
Lesson 10: Painting textures for hands and feet
Lesson 11: Painting textures for chest, arms and legs
Lesson 12: Painting textures for club and skirt
Lesson 13: Applying textures and creating a final render


http://simplylightwave.com/lightwave-tutorial/t547/

Simply Lightwave: Caveman Volume 2 - UV and Texturing

9 juillet 2014

Caveman Volume 1: Organic Modeling

http://simplylightwave.com/lightwave-tutorial/t546/

519f9c48dc644c0e3930d408e72fd1c4

Master organic modeling in LightWave with this course that takes a concept through to 3D model.
We start by blocking out the basic shapes for the head and body, focusing on good proportion, before moving on to the limbs and finer details. Working in polygon and subpatch mode you’ll learn how to create nice topology with clean edge-flow and geometry that’s suitable for rigging and deforms well when animated. Sculpting in details such as muscle tone and skin folds on the chubby character will aid you in more realistic work.

Information :
Lesson 1: Setting up backdrops and blocking out the character
29 Minutes

Lesson 2: Adding details to the head
37 Minutes

Lesson 3: Adding details to the head continued
26 Minutes

Lesson 4: Cleaning up topology on the head
29 Minutes

Lesson 5: Adding details to the upper body
38 Minutes

Lesson 6: Continuing to add details to the upper body
37 Minutes

Lesson 7: Modeling the hands
26 Minutes

Lesson 8: Detailing the hands and nails
31 Minutes

Lesson 9: Modeling the feet
36 Minutes

Lesson 10: Modeling the skirt and tweaking topology
45 Minutes

Lesson 11: Adjusting topology in neck region
24 Minutes

Lesson 12: Modeling the gums with teeth
24 Minutes

Lesson 13: Creating the club and adding hair to the final model
32 Minutes

Publicité
Publicité
<< < 1 2 3 > >>
Publicité
Archives
3d réalisation
Publicité