Canalblog
Suivre ce blog Administration + Créer mon blog
Publicité
3d réalisation
3d réalisation
Derniers commentaires
Visiteurs
Depuis la création 14 266
tutorial
12 janvier 2017

Blender Tutorial: Material Library

Publicité
Publicité
20 novembre 2016

bon j attaque la réalisation d'une petite scene 3d avec blender et peut etre unity

bon au bout de  15 jours de tuto de blender j'ai fait un peu le tour de ce que j'aurais à faire pour mon anim ( realisé au brouillon un peu tout  l ensemble ). Il me reste  à tout  refaire correctement.

la j'en suis à ca :http://ahp.li/6e33b5077a6300b8d3b3.avi

http://ahp.li/3c1c01581721180cb58e.avi

http://ahp.li/34c862478991acd2f268.avi

j'ai réalisé ma scene dans blender maintenant je vais la transferer dans unity 3d et aussi dans blende4web pour la visualisé en webgl dans un navigateur


introduction:

si on veut progresser en 3d en informatique en électronqiue il faut avoir un petit projet pas compliqué au début  à réaliser

ici je vais essayer de reproduire la petite voiture qui tourne autour de la montagne ci dessous ( pour moi ca sera un cube qui tourne autour d'un cone en emettant fumées et lumieres et bruit)

le tuto est en anglais ou francais en fonction vidéos trouvées

1/utilisation de blender

pourquoi blender: parceque qu il est gratuit legé performant et avec plein de tutorials

petits defaut de blender pour un débutant: ouvrir et fermer les fenetres  ( pas vraiement intuitif) et un petit bug quand on fait alt shift ( tres utile en vue 3d) ca commute le clavier azerty qwerty donc les touches marche plus grrrr et en plsu pas vraiement signalé ce bug)

un tuto en ligne :https://openclassrooms.com/courses/debutez-dans-la-3d-avec-blender/entrez-dans-l-univers-3d

 un tuto papier :http://www.editions-diamond.fr/creez-votre-premiere-animation-3d-avec-blender/

un tuto debutant en anglais https://youtu.be/zOvawDOWqC4

1/choix unite mesure

http://pbrn.blogspot.fr/2011/01/tutoriel-unites-de-mesures-blender-25x.html

2/réalisation du terrain:

superbe https://youtu.be/56N5JYaJBi4

https://www.youtube.com/watch?v=I7YhIzQ_7DE

https://www.youtube.com/watch?v=ilmS_CeKCuo

via terragen  http://blenderclan.tuxfamily.org/html/modules/content/?id=21

https://wiki.labomedia.org/index.php/Blender:Les_Modifiers_Displace_et_Decimate

avec ant https://cgcookie.com/archive/tip-using-the-ant-landscape-add-on/

tapper blender landscape low poly dans youtube ou google

https://youtu.be/oBtsbs9aiW8

 dans unity

https://www.youtube.com/watch?v=_7nII8LoxpE

4/realisation du ciel:

https://www.youtube.com/watch?v=Rif_3N8IynM

skydom flip normal https://www.youtube.com/watch?v=pWptDU3xG60

https://www.youtube.com/watch?v=uWSeBoIDJV4

https://en.wikibooks.org/wiki/Blender_3D:_Noob_to_Pro/Build_a_skybox

transfert du skydome dans unity 3d

mesh texture et uv mapping https://youtu.be/Tovu1A0LxeQ  et https://youtu.be/e_dTES_CCbY

mot clé flip normal cull backface culling

Option 1: Edit the sphere mesh so that the normals point inwards. You can do that in your 3D application: if you're using Blender, go to edit mode, select all vertices and ctrl+f->flip normals. You can switch on drawing vertex normals in the mesh tools in Blender.

Option 2: Add/modify the Cull property of your material from Cull Back to either Cull Front or Cull Off.

https://docs.unity3d.com/Manual/SL-CullAndDepth.html

pour creer un nouveau shader  asset create shader open  monoeditor  choisir un nouveau materiel et clic shader pour lui mettre le shader crée


5/creation d'un tunnel sous montagne

https://openclassrooms.com/courses/blender-l-art-de-trouer-avec-les-booleans

http://www.unity3d-france.com/unity/phpBB3/viewtopic.php?f=2&t=739&start=10

https://www.cgtrader.com/3d-models/tunnel

https://www.renderosity.com/mod/freestuff/the-gate/76744

6/creation neige

http://www.blenderguru.com/tutorials/make-snow/

7/sapin de noel

http://www.blenderguru.com/tutorials/how-to-make-a-christmas-tree/

8/realisation de la "route"

http://blendercommunaute.e-monsite.com/pages/masque/tutos-de-modelisation/tuto-modelisation-d-un-engrenage.html

https://youtu.be/BJeV8djtlyU

8/petit train

https://www.youtube.com/watch?v=OM9Nso_ncEk

https://youtu.be/PY6A77nSr2o

https://youtu.be/nKc7b3Kuums

http://blender.freemovies.co.uk/train-tutorials/


Blender 3D Train Wheel Animation


rigging a car wheel


faire suivre un chemin au petit train et faire pointer la caméra sur lui https://openclassrooms.com/courses/debutez-dans-la-3d-avec-blender/animer-la-camera

http://tf3dm.com/search/?q=train&search=Search

http://vargov3d.com/models/index/caterory/24/

la c est plus compliqué:https://youtu.be/RZHUxcBIibE https://youtu.be/A3pOMaLbFb8

8b)changer caméra active

https://youtu.be/kq0wtgekSyA

https://youtu.be/Djd178qmjY8

https://youtu.be/IZmMwbriww0

https://youtu.be/DQDRatqNSSo

en utilisant script  on peut changer de camera de maniere plus sophistiqué: http://jmsoler.free.fr/didacticiel/blender/tutor/cpl_changerdecamera.htm

9/fumée du petit train à vapeur

https://youtu.be/tL0G5oOjdtk

parametre du quick smoke:https://youtu.be/pYNr0ZtyD1c

a/tuto sur particule

bon la c est du photoréaliste mais bien expliqué https://youtu.be/QCMyvcc3ZaU

http://www.elephorm.com/tuto-blender-techniques-avancees/simulation-de-fumee

10/lac ou riviere

ship on the ocean https://youtu.be/sfi7HW8qHAo

https://youtu.be/FDv8zt_L_4s

https://youtu.be/WdaQ7ee_IXQ

https://youtu.be/vfRlLbhlm4o


annexe:

aligner vertice ( ai eu du mal a le trouver donc je le note)

creation montagne réaliste:https://youtu.be/pzkUtLqYA2M

riviere et arbre réaliste:https://youtu.be/WLdnV1YpKR4

pour noel

https://youtu.be/bZudmvS8DJU

les modifier: http://www.blenderguru.com/articles/blender-101-modifier-encyclopedia/

juste pour voir:

http://www.autodesk.com/indie-game-maker/home?mktvar004=681748&internalc=true


blender4web:

https://www.blend4web.com/doc/en/addon.html#addon


26 septembre 2015

trucage video avec blender

blender trucage

blender 2

10 juillet 2014

Caveman Volume 4 - Storyboarding to Final Animation 24 Lessons Project Files Included MP4

http://simplylightwave.com/lightwave-tutorial/t549/

cd41b28317987caa223f85f7cb96369c

Learn the typical studio production pipeline with pose planning and storyboarding to create a full 2D animatic, which is then converted into a 3D animation in LightWave by following the workflow of pose-to-pose blocking and refining.
This project will get you insight into the planning process for animation, as well as teach you how to apply important animation principles such as squash and stretch, timing and spacing, anticipation, weight, staging and arcs.

Information
Lesson 1: General overview of the animation workflow in LightWave
Lesson 2: Useful animation plugins and preparing the character
Lesson 3: Pose planning and thumbnail sketching begins
Lesson 4: Pose planning and thumbnail sketching continues
Lesson 5: A look at different programs available for storyboarding
Lesson 6: Storyboarding - creating the key poses
Lesson 7: Storyboarding - breakdown and inbetween poses
Lesson 8: Finalizing and exporting the storyboards
Lesson 9: Setting up the key poses and animation blocking
Lesson 10: Setting up key poses and animation blocking continues
Lesson 11: Setting up key poses and animation blocking continues
Lesson 12: Adding breakdown poses
Lesson 13: Adding breakdown poses continues
Lesson 15: Refining the animation and clean-up work continues
Lesson 16: Work on the timing
Lesson 17: Work on the timing continues
Lesson 18: Additional breakdowns and arcs
Lesson 19: Refining the timing and adding extra keys
Lesson 20: Improving the arcs
Lesson 21: Loosening up the animation and secondary action
Lesson 22: Reviewing and tweaking the animation
Lesson 23: Creating the club pick up
Lesson 24: Adjusting tangents and adding final details like blinks

Simply Lightwave: Caveman Volume 4 - Storyboarding to Final Animation

10 juillet 2014

Caveman Volume 3 - Rigging, Puppet Controls and More

8435b290f10047b4bc52517f08fc66b6

http://simplylightwave.com/lightwave-tutorial/t548/

Take the mystery out of rigging and learn how to meet the requirements of a demanding animator by providing a fast, fully featured rig.
The topics covered in this tutorial include bones, animation controls and constraints, expressions, hybrid IK/FK setups, as well as efficient weight mapping and skinning. We set up constraints and puppet controls, while looking at good rigging practices, different techniques and how to avoid some common pitfalls, giving us a professional rig as an end result.

Information
Lesson 1: Creating bones for the spine and legs
Lesson 2: Creating bones for the arms and hands
Lesson 3: Adding animation controls
Lesson 4: Adding IK handles and testing deformations
Lesson 5: IK handles and testing deformations continued
Lesson 6: IK handles and testing deformations continued
Lesson 7: Refining the rig
Lesson 8: Creating bones for the head
Lesson 9: Rigging head and neck area continued
Lesson 10: Creating joint morphs and correcting deformations
Lesson 11: Joint morphs and deformation corrections continued
Lesson 12: Deformation tests and refining the rig
Lesson 13: Soft bodies and completing the rig

Simply Lightwave: Caveman Volume 3 - Rigging, Puppet Controls and More

Publicité
Publicité
9 juillet 2014

Caveman Volume 2: UV and Texturing

5f0ad78eacecb19ee9088c54f8153afe

Learn how to create a number of different textures for your character work in this project. After laying out UV's in LightWave, we work with weight maps, gradients and procedurals to create a nice base for the textures, before bringing them into Photoshop for hand painting and detailing. Here you'll learn how to create color, specular and bump maps for all your organic needs including skin, eyes, gums, teeth, nails and cloth, and bring them together in LightWave.

Lesson 1: UV layout of the arms, hands and skirt
Lesson 2: UV layout of the head
Lesson 3: UV layout of the remaining body and texturing starts
Lesson 4: Procedural textures for mouth and teeth
Lesson 5: Creating weight maps
Lesson 6: Applying gradients to skin and creating the tongue
Lesson 7: Organizing workflow for texture painting in Photoshop
Lesson 8: Painting textures for head and face
Lesson 9: Painting textures for head and face continued
Lesson 10: Painting textures for hands and feet
Lesson 11: Painting textures for chest, arms and legs
Lesson 12: Painting textures for club and skirt
Lesson 13: Applying textures and creating a final render


http://simplylightwave.com/lightwave-tutorial/t547/

Simply Lightwave: Caveman Volume 2 - UV and Texturing

9 juillet 2014

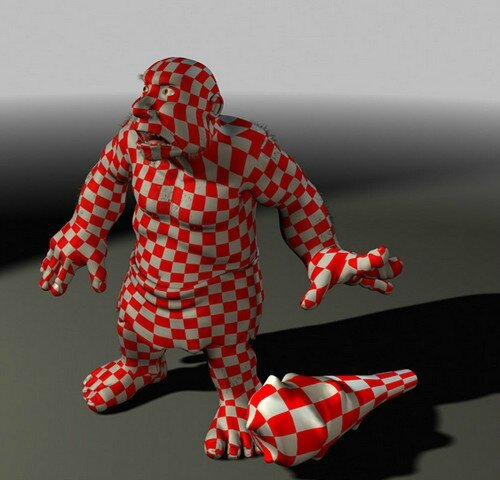
Caveman Volume 1: Organic Modeling

http://simplylightwave.com/lightwave-tutorial/t546/

519f9c48dc644c0e3930d408e72fd1c4

Master organic modeling in LightWave with this course that takes a concept through to 3D model.
We start by blocking out the basic shapes for the head and body, focusing on good proportion, before moving on to the limbs and finer details. Working in polygon and subpatch mode you’ll learn how to create nice topology with clean edge-flow and geometry that’s suitable for rigging and deforms well when animated. Sculpting in details such as muscle tone and skin folds on the chubby character will aid you in more realistic work.

Information :
Lesson 1: Setting up backdrops and blocking out the character
29 Minutes

Lesson 2: Adding details to the head
37 Minutes

Lesson 3: Adding details to the head continued
26 Minutes

Lesson 4: Cleaning up topology on the head
29 Minutes

Lesson 5: Adding details to the upper body
38 Minutes

Lesson 6: Continuing to add details to the upper body
37 Minutes

Lesson 7: Modeling the hands
26 Minutes

Lesson 8: Detailing the hands and nails
31 Minutes

Lesson 9: Modeling the feet
36 Minutes

Lesson 10: Modeling the skirt and tweaking topology
45 Minutes

Lesson 11: Adjusting topology in neck region
24 Minutes

Lesson 12: Modeling the gums with teeth
24 Minutes

Lesson 13: Creating the club and adding hair to the final model
32 Minutes

6 juillet 2014

modeler la navette spatial

http://simplylightwave.com/lightwave-tutorial/t576/

http://simplylightwave.com/lightwave-tutorial/t577/

Welcome to a new tutorial from SimplyLightwave. This time we bring you the making of the Space Shuttle Discovery, as NASA has decided to retire their shuttle program we thought we'd have a go at making our own.
Unfortunately we didn't quite have the budget to recreate it in the garden, so we gave this to Milivoj Popovic and asked him to do it in Lightwave. Begin creating stunning photorealistic models with over 8 hours of project-based training in this new tutorial series from SimplyLightwave. Follow along with Milivoj, lead modeler at

Lemonade3d, in this comprehensive project where you will learn the complete workflow to create a realistic high-polygon space shuttle in Lightwave. After completing this project, you'll have a much better understanding of the entire process to make a realistic and believable vehicle in Lightwave. Perfect for intermediate users.

This tutorial was created in Lightwave 9.6 and is also suitable for users of Lightwave 10 and 11.

Part 2 in this series covering texturing and scene assembly will be released next month. Happy Easter!
Learn to paint textures for hard surface models to a high standard, as well as set up lighting and materials to get a photorealistic render of the space shuttle

Discovery. Through 20 hours of tuition, this project-based course will teach you all the texturing and lighting techniques you'll need to know to create your own top-

notch renders. We also covers post-production of images and creating seamless environment composites in Photoshop

Volume 1 : Information
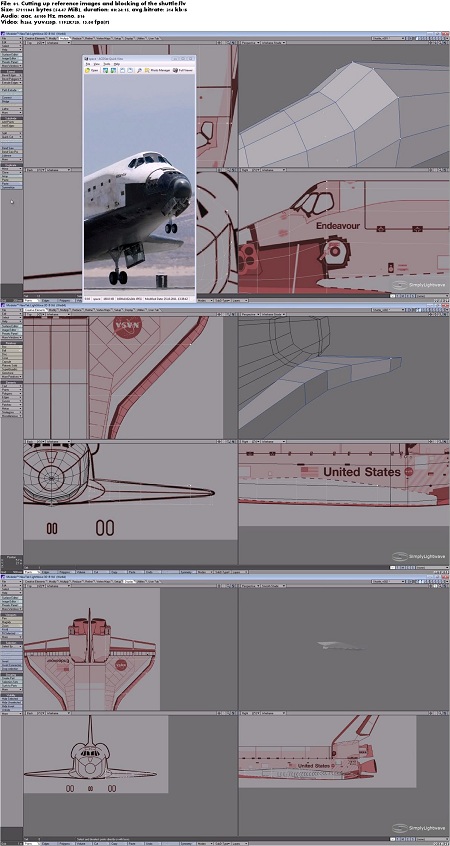
Lesson 1: Cutting up reference images and blocking of the shuttle
Lesson 2: Blocking out the tail and connecting wing with fuselage
Lesson 3: Connecting fuselage with the tail and main shuttle body
Lesson 4: Modeling the parts of the back of the shuttle
Lesson 5: Cutting out holes and continuing to add detail to the back
Lesson 6: Creating ring structures and pipes
Lesson 7: Connecting surfaces at the back of the shuttle
Lesson 8: Creating the windows at the front and adjusting topology
Lesson 9: Continuing to add detail to the windows and trim
Lesson 10: Sharpening up edges and aligning window trim with body
Lesson 11: Aligning various surfaces of the body
Lesson 12: Modeling hinges and wires for landing gear cover
Lesson 13: Creating the wheels and other parts for the landing gear
Lesson 14: Realigning surfaces for mirroring
Lesson 15: Making adjustments to the nose cover at the front
Lesson 16: Freezing geometry and final tweaks

Volume 2: Information

Lesson 1: UV mapping begins
Lesson 2: UV mapping continues
Lesson 3: Adding details to the geometry for more realism
Lesson 4: Making adjustments to the model for landing pose
Lesson 5: Test rendering reflection maps and making window glass
Lesson 6: Creating the wing tile texture
Lesson 7: Making the termal tile texture for the bottom of the body
Lesson 8: Adding detail to the tile textures
Lesson 9: Surfacing and adding procedural noise textures to tiles
Lesson 10: Painting in detail on the wing color map in Photoshop
Lesson 11: Adding more detail and irregularity to the wing texture
Lesson 12: Texturing the area where the wing and belly meet
Lesson 13: Adding text and logo to the wing and painting dirt
Lesson 14: Texture painting of dirt and discoloration on metal
Lesson 15: Creating a color map for the cockpit and upper body
Lesson 16: Continuing to create textures for the upper body
Lesson 17: Painting in panel lines for the tiles of the upper body
Lesson 18: Painting of panel lines continues
Lesson 19: Finalizing panel lines and breaking up symmetry
Lesson 20: Texturing the bottom of the wing
Lesson 21: Texturing the nose
Lesson 22: Continuing to add detail to the nose textures
Lesson 23: Painting the texture maps for the tip of the nose
Lesson 24: Texturing the wing flaps
Lesson 25: Connecting lines where different texture maps meet
Lesson 26: Texturing of tail, wheels and shuttle exhaust
Lesson 27: Continuing to texture shuttle exhaust and back area
Lesson 28: Adding dirt to the sides of the shuttle
Lesson 29: Creating the bump maps for the shuttle body
Lesson 30: Finishing touches to the shuttle side maps
Lesson 31: Tweaking maps and assigning them to the model
Lesson 32: Painting the environment composite with landing strip
Lesson 33: Scene set up with grass and landing strip in Layout
Lesson 34: Adding weight maps and test rendering shuttle materials
Lesson 35: Tweaking lights and materials in Layout
Lesson 36: Creating materials for landing gear and windows
Lesson 37: Continuing to tweak textures and materials
Lesson 38: Adding smoke trails with particles and compositing them
Lesson 39: Color correction and finalizing composite in Photoshop

Simply Lightwave: The Space Shuttle Discovery Volume 1,2

6 juillet 2014

Creating a Vampire Character with ZBrush and 3ds Max Complaint

10 mai 2013

tutorial irrlicht

Publicité
Publicité
<< < 1 2 3 4 5
Publicité
Archives
3d réalisation
Publicité